Crafts ~ Recipes ~ Our New House ~ Book Reviews

Showing posts with label recipes. Show all posts

February 21, 2012

What to do tonight ? Make Apple Dumplings of Course....

I like to experiment. With recipes. I will try just about anything I have at least half the ingredients for. Tonight I had a bag of apples sitting on my counter....meant to bait a porcupine, but that is another story for another time. If you ever have a snoring porcupine take up residence under your hunting shack, just email me, I've already done the research for you.

Anyway...Tonight I made Apple Dumplings from a random recipe I found. It required the peeling and coring of 6 medium apples,

Then I made a basic pastry crust, wrapped the apples, and put them in a too big pan. Note: if you are going to attempt to recreate these, you must must must must must use an 9x9 pan. Not a 9x13. The smaller pan will keep the juice juicy. Or something.


Don't be scared of the pastry dough either...it was very easy. Some good parchment paper will help as well. This was the finished product after 35 minutes in the oven at 400*. In the future, I will cover these for the first 20 minutes. Also, I will cook them in a smaller pan to enable the juice to remain juicy. Juicy enough or not, they were awesome and even better with ice cream.

Here is the recipe, complete with my after cooking experience modifications.

Ingredients:

Dough:
2 cups flour
1/2 cup shortening
1 1/2 tsp baking powder
1/3 cup milk

Cut together in a mixing bowl until it forms a soft ball. Place 1/2 the ball on a large square of parchment paper, roll out flat, cut each half of the dough into three equal sized squares. 

Peel and core 6 medium apples. Wrap in dough, pinch dough together at the top. Place apples in 9x9 pan. Preheat oven to 450*.

Topping:
3/4 cup honey
3 TBSP butter
1 TBSP shortening
1/4 tsp salt
1/4 tsp cinnamon
1/4 tsp nutmeg
1/4 cup brown sugar

Mix all ingredients in a glass bowl. Melt in microwave, stir well. Pour over top of apples. Cover apple pan in tinfoil, do not seal edges of foil. Bake for 20 minutes. Uncover. Bake remaining 15 minutes. Devour.


Linked with : A Bowl Full of Lemons,

February 9, 2012

Bad Blogger, Good Bread


Bad blogger. Busy blogger is more like it, but whatever. 

No excuses, however, can I just mention how extremely excited I am that I will be done with school in August. Done. Over. Completed. CAN’T. WAIT. 

Anyway, I’ve been busy. That is no excuse, because there are no excuses here. However, I need to get back into a rhythm. A routine, so to speak. I have heard that those exist.

What have I been doing lately. Anyone out there who can remind me? Seriously, the month of January was a whirlwind. Truly. Madly. Deeply. As you can see it ran by so fast that I lost my mind. Not really. I lost a few other things though. A button off of my favorite pea coat, the flashlight that is always by the front door, and my phone charger. Minor compared to my mind, but still. 

So, what to do when you don’t have time to think? Bake. Obviously. Yesterday I made our favorite zucchini bread recipe and it turned out fabulously, as it does every single time. I’m not kidding, it is like impossible to screw this up. I modified this recipe from one I found in my Grandmother's old stash.  This recipe, as with most I make, was fairly basic and fairly easy. I used shredded zucchini that I had frozen last summer.


Here is the recipe:
2 C. sugar                             1 tsp salt                             
1 C. Canola Oil                    1 tsp baking soda
3 eggs                                   ¼ tsp baking powder
2 tsp. vanilla extract              1 tsp cinnamon
3 C. flour                              2 C. shredded zucchini
Optional: Apples, nuts, cranberries, chocolate chips…whatever you want to throw in. 

Pre heat oven to 350*
Beat oil, sugar, eggs and vanilla until blended. Combine flour, salt, baking powder, baking soda and cinnamon into sugar mixture until moist. Stir in zucchini and optionals. Transfer batter to two greased bread pans. Bake at 350* for 55 minutes.

I'm linking with these great parties... What's Up Wednesdays, Share the Wealth Wednesdays,Wow Me Wednesday, Show and Share, Crafty Sasse Wednesday, Take A Look Tuesdays, A Bowl Full of Lemons, Ta-Da Tuesdays, Party Time, Craft-O-Maniac Monday, More the Merrier Monday,

January 12, 2012

Warm and Cozy Potato Soup


In case you haven’t gotten the hint yet, we like to eat. Don’t take that the wrong way, we don’t like to stuff our faces at  McDonald’s (not often anyway) or even general restaurant food very often, but we do get enjoyment from the food that we cook. Both myself and my husband like to cook and we share the duties frequently. That doesn’t mean we always have an idea on what to make for dinner. There is nothing that irritates me more (okay maybe there are some things, but very few) than when Doug asks me what I want for dinner, I answer, and he responds “oh, no I don’t want that, how about…..” . WHY DIDN’T YOU JUST SAY THAT IN THE FIRST PLACE! J
Vent session over.
Last night was not this situation, we both agreed that potato soup would be a great way to bring in the impending snow storm (yes, you heard correctly, it is January 12th and we are getting our very first Wisconsin snowstorm). I have to admit, I make some awesome potato soup. I promise, it’s easy (pretty much everything I cook is easy….I leave the tough stuff to Doug).
So, here is my potato soup recipe. Disclaimer: This soup does start with a rue…..no, don’t stop reading now. I promise, from someone who was absolutely terrified of making one for a really long time, it’s not hard. To begin, melt 4 TBSP butter in a soup pot. When butter is melted, add flour, one tablespoon at a time and whisk. Add flour until soft ball forms in the middle. Once it has formed, continue stirring frequently while it cooks for 2-3 minutes. Then add 2 cups of milk while whisking. When this is well blended, add two additional cups of milk. Cook on low for 5 minutes or so. Add 2-4 cups of water, depending on the consistency you prefer. Add garlic salt to taste andAlpine Spice. Then add 2 cups chopped carrots, 2 cups cubed potatoes, and 1 cup cubed ham or small amount of crumbled bacon to taste. Then the secret ingredient goes in, I add approximately 1 ½” of Velveeta cheese cubed. Stir well, cover, and simmer on low for about an hour. When carrots and potatoes are cooked, soup is ready.

January 8, 2012

Chicken Provolone


MMMMmmmm…..this is one of my favorite recipes. It is my fallback when I need something delicious but easy. The ingredients are very basic, I usually have them on hand anyway. Prep time can be a little longer for this recipe, about a ½ hour plus 40 minutes in the oven, but it is so worth it.


To begin with, I take a package of boneless skinless chicken breasts and beat them with a meat hammer until they are double their original size.

I then cut them in half. Each piece is breaded in a flour, cracker, and breadcrumb mixture that is well seasoned with Alpine Spice. Each piece is then dunked in an eggwash (one egg beat into ½ cup of milk) and re-breaded. I then brown them lightly in a pan and place them in a glass baking dish ( I usually use a 9x13, but it totally depends on how much chicken you have).

Over the breasts I layer mozzarella or provolone cheese, shredded or sliced, basically whatever I have on hand or was on sale. Over that I pour a large container of regular spaghetti sauce, and dust with a little additional cheese. I cover the pan with tinfoil and bake for 40 minutes at 350*. I serve this over linguine noodles with a side salad. Yum.


I'm linking up!

December 19, 2011

Christmas Cut Outs

I love to bake. I wouldn't say that I am a great baker by any means, but I enjoy it. Every year I find myself looking for the perfect cut out cookie recipe. I dislike puffy cut out cookies, I don't like overly soft ones, I prefer them to not be thin and crunchy. I have tried recipes that use sour cream, no eggs, powdered sugar, and a multitude of other odd ball ingredients. Every year I try something new. Until next year.

I finally found a recipe I love and I will never ever ever ever make any other sugar cookies again. Ever. Swear. I got this recipe from here, thank you Pioneer woman. I modified it somewhat by removing the citrus zest. I did not make the glaze for these, but rather opted for a different glaze recipe that I basically made up on my own. I'll fill you in below. Did I mention how amazing these are? I don't even like sugar cookies as a rule and I ate a whole bunch of these. Even better, this recipe makes about 1 dozen, which is perfect since there are just two of us. 

Creamed the shortening, sugar and vanilla....

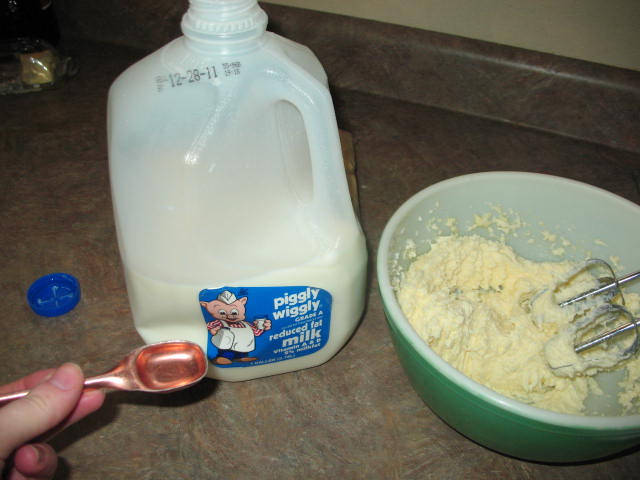
Add milk...


Add dry ingredients and mix well....


Ball the dough and wrap it in wax paper...

Pop in the freezer, watch a half hour of Chopped, take out and roll.......

Then comes the fun part...use your cookie cutters (I have over 100 thanks to my sister, great gift ;))...


Bake.


While your cookies are cooling, make frosting. I wanted to try something new this year so I made an icing, which I have never really done before. Here is the recipe I used, 
1 cup of powdered sugar, 2 TBSP of milk, 2 TBSP of corn syrup, 1/2 tsp almond extract. I mixed the powdered sugar and milk together, then added the corn syrup and almost. Finally, I divided it into separate bowls and added food coloring. 

Two things with the food coloring. First, I did not realize how much less food coloring would be necessary for icing vs. frosting. I always dislike the washed out colors that you get when you color frosting, so I added a lot of color to the icing. As you will see, it was plenty. My blue is blue. Like, navy blue. So, be aware. Second, I got to the red and realized I had only like four drops of red. I even cut the bottle open and squeezed every last little bitty fleck of red out, but my icing was just a dull pink. Yuck. Mixing all my beautiful bright colors with a pepto-pink red frosting would not have been good. 

Time for a brainstorm. Brace yourselves people. After scrounging through my baking cabinet I decided to use red kool aid for color. It worked magically. Ten points for me. I added about half the packet of cherry flavored kool aid to the icing and mixed it in. I got a great red color. The catch, as you may have guessed, is that my red frosting has a distinct tart cherry flavor to it. Oh well, the price we pay for beauty. 


I think they look super. Even better, they taste super. Like I said, I will not be experimenting with a cookie recipe any more. These were as close to perfect as I could have asked for. Maybe I will play around with the frosting/icing next year instead. 

I'm so glad my cookie baking is almost over. I'll be back again this week with one more recipe for holiday baking. 


Linking Up 
Dittle DattleDebbiedoo's blogging and blabbingPolish The Stars


December 11, 2011

Chocolate Peanut Butter Balls


 Love these. L.O.V.E. Seriously. And guess what, they have one major similarity with everything else I have been doing lately, they are super easy. No kidding. People who think that I am being super lazy this holiday season should redirect to this post J .
So, what do you need?
1 cup peanut butter
½ cup marshmallow fluff
2/3 cup rice krispies
1 ½ cups chocolate chips
2 TBSP shortening


To begin, mix the peanut butter, marshmallow fluff, and rice krispies. Yum. Try not to stick your fingers in there too many times.

 Next, melt the chocolate chips and shortening in the microwave.

 Stir frequently. Melted chocolate should be relatively thin for this recipe so that it coats the peanut butter balls fairly easily.


Finally, roll the peanut butter mixture into 1” balls between your palms. Be careful, the most important part of this recipe is keeping the balls bite sized. No need to waste energy on multiple bites. Dip the balls into the chocolate until thoroughly coated.

Place on wax paper on a cookie sheet and refrigerate until chocolate has hardened. These may be frozen until you are ready to use them. If there are any left to freeze.

Total time it took me to make these…less than it took to write this post. Seriously, about 20 minutes, start to finish. Go, run, make your own!

December 10, 2011

Super Easy Christmas Candy


This candy is SO EASY to make, I am almost embarrassed to blog about it. However, it has become a Holiday staple for me, so I feel it should be included. I make this start to finish in about an hour. There are so many different options for it, you really can be creative and do whatever you like.
First, I melt 6 – 8 oz of candy. For demonstration purposes, I started with ivory bark. I add 1 TBSP of shortening and melt it in the microwave, stirring frequently.

 To that, I added ¼ cup of chopped ( I used my food processor) oreos.


 Stir well. I then spread the mixture on to a wax paper covered jelly roll pan. I sprinkle  a few remaining oreo crumbs on top and refrigerate until firm.

As I mentioned above, there are a ton of options for this. I also make a version with mint extract and candy canes, and with mint extract, green food coloring, and chopped Andes mints on the top. 


It really doesn’t get any easier than this! When the candy is firm, I take it out, break it into shards and freeze it in Ziploc bags until I need it.
I’m on a roll today, so I’m off to continue my candy making madness.

shabby shares logoSweetasSugarCookiesLink PartyPhotobucket{nifty button}

December 7, 2011

Easy Chicken Dumpling Soup

I know that we are all in the Christmas spirit and chicken dumpling soup sounds strangely out of place with all that holiday cheer, however, I have had a sick husband the past couple of days so I quickly (as quickly as you can make chicken soup) stirred up a pot for myself and the Grinch. Not to mention that I don’t need much of an excuse to make this soup, it’s one of our favorites.


Soup Ingredients:

1 whole chicken

2lbs carrots - chopped

3 large celery stalks -chopped

1 onion, diced

Chicken stock

Seasoning


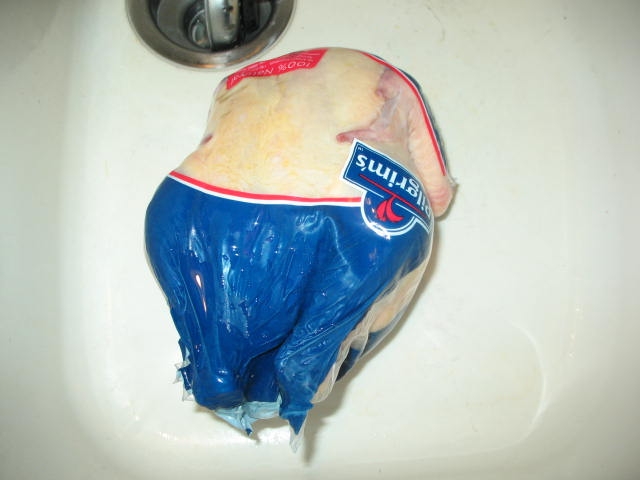
To start out, I thawed a 4lb chicken in cold water in the sink. After removing the innards (please don’t forget to do this! If my sister Olivia is reading this, this advice is for you) I placed the chicken into a stock pot 2/3 full of boiling water. I added a TBSP of Herbs de Provence to the pot and boiled the chicken for 30 minutes.


When the chicken had cooked, I removed it from the pot with tongs and placed it on a platter. I added the carrots, onions, and celery. Next I added 3 TBSP chicken stock and a healthy dose of garlic salt.


I proceeded to boil the veggies in the stock while picking the chicken clean. After I had added all of the chicken to the pot, I boiled the soup until the carrots had begun to soften. Nobody likes mushy carrots, so I try to catch them before they get to that point. When the soup is theoretically done, you will want to check the seasoning. You may need to add more garlic salt or chicken stock to taste.

Into all this yummy goodness, we must add dumplings. No chicken soup is complete without them. My husband is totally the dumpling maker in our family, but as I mentioned, he was sick so it was up to me. I persuaded him to give up the recipe and I must say, I think I got it right the first time. Ten points for me.

Dumpling Ingredients:

1 egg

1 cup all purpose flour

¼ cup cold water


First I added the flour to the egg and stirred it together with a fork (apparently using a fork is important because I started out with a whisk and got told). Then add the water and mix it all together. When it is the consistency of oatmeal, maybe a little thicker, drop it by the forkful into the pot of boiling soup (soup should be brought to a rolling boil prior to dropping in dumplings). Add a lid to the pot and let them cook for 10 minutes or so. I will confess that I had to double the batch of dumplings…there are just never enough to go around!

So, I am off now to enjoy this wonderful soup du jour, alone, on my couch, while my husband is quarantined. How about you guys? Made any delicious soups lately? Battling any gross bugs? Any good ideas for disinfecting? Let me know, I’d love to hear from you!


December 5, 2011

Chocolate Peanut Butter Pucks


In my holiday baking madness, I have decided this year to try several new recipes. The first one I decide to experiment with was Chocolate Peanut Butter Pucks. I cannot even explain to you how insanely easy these are to make. I got the recipe from the Joy of Baking and tweaked it just a little bit.

First, I softened ½ cup peanut butter and 2 TBSP butter in the microwave, then mixed them together.


Next, I mixed in ½ cup powdered sugar and ½ a crushed up graham cracker. In hindsight, I could have crushed the whole graham cracker. I mixed that up well and left it sit.


Then, I chunked up 18 oz of chocolate, milk and semi sweet. I added 1 TBSP (a big spoonful) of shortening and melted that in the microwave. My microwave has a “melt chocolate” setting; thank you Samsung, but if yours does not, I would stir it every 30 seconds or so.


To make the cups, I added muffin cups to my cupcake tins, I did 24.

I ladled a spoonful of chocolate into each tin and coated the bottom of the muffin cup.

Then I dropped a ½ spoonful of the peanut butter mixture into the cups (This might also be the spot where I sampled the peanut butter mixture).
Finally, drop the remaining chocolate over the peanut butter into the cups. I may have used a little too much chocolate on the bottoms, as I did not have enough to fill all 24 cups, I only managed 21.

Finally, place the pans into the fridge until they firm up.


Pure deliciousness.

I froze mine in their paper cups for holiday parties.

 Here is the recipe.
Combine ½ cup peanut butter with 2 tbsp softened butter. Add ½ cup powdered sugar and 1 crumbled graham cracker. Set aside.

Melt 18 oz. chocolate ( I mixed semi sweet and milk chocolate) in a microwaveable bowl with 1 TBSP shortening until smooth. Stir at least every 30 seconds, if the chocolate becomes sticky, add 1 TBSP honey to thin.

Line 24 cupcake tins with muffin liners. Add ½ spoonful of chocolate to each liner. Smooth around to cover the bottom of the liner. Drop in 1 spoonful peanut butter mixture to each liner. Use remaining chocolate to cover the peanut butter.

Place pans in the refrigerator until firm. Freeze or serve!

So, other than my super holiday sweet obsession lately, I’ve been so busy getting ready for Christmas? How about you? Anyone all ready for Christmas? Anyone else on a food kick? I’d love to hear from you!

I linked to a few Monday parties, show them some love!
Polish The StarsNinth Street Notions